Cara Melacak Foto di Mesin Pencari Google dari HP Android

Di sesi Tutorial kali ini admin Dunia Android ingin membagi tips tentang cara melacak atau menemukan Image/Foto dari mesin pencari google dari hasil upload gambar yang kita sertakan di kotak pencarian. Mungkin Sobat pembaca ada yang masih bingung bagaimana memaknai arti Judul diatas, tapi tenang saja admin akan membahasnya lebih gamblang di bawah ini.

Cara Melacak Foto di Mesin Pencari Google dari HP Android

Mungkin anda suatu waktu pernah menemui suatu benda atau gambar di mana saja itu tempatnya dan tidak tahu apa nama image tersebut maka mesin pencari google adalah alternatif terbaik untuk bertanya dikala tidak ada seseorang yang bisa kita tanyai saat itu.

Atau dalam suatu kasus tertentu anda ingin melakukan pelacakan gambar, misalnya Foto anda sendiri apakah pernah beredar di dunia maya atau belum dan dimana letak situs tersebut berada maka dengan mudah ditemukan via mesin pencari google image.

Jadi Inti dari pembahasan kita admin kali ini adalah melakukan pencarian nama atau benda sejenis dari gambar yang kita upload nantinya agar kita tahu relevansi atau kecocokan dari nama image tersebut. Dan untuk fungsinya tentu bisa anda gunakan sebagai alat pelacak foto di internet maupun ketika anda tidak tahu apa nama dari suatu benda maka bisa bertanya ke google search engine melalui fitur pencarian imagenya.

Untuk mempersingkat waktu mari simak tips tentang cara melakukan pencarian nama gambar atau benda melalui mesin pencari google via Ponsel android di bawah ini.


1. Silahkan buka aplikasi browser Chrome di ponsel android sobat, kemudian masuk ke situs pencarian image yaitu > https://www.google.com/imghp

2. Setelah masuk ke situs pencari, kita ubah dulu mode mobile layar ke mode Desktop agar fitur pencarian gambar bisa keluar, caranya masuk ke menu Chrome, letaknya di pojok kanan atas sendiri dan pilih opsi 'Ubah situs Desktop' lalu aktifkan

melakukan upload image di mesin pencari google

3. Setelah mengaktifkan fitur tersebut nantinya browser akan memuat ulang situs google dan tampilan akan persis layaknya di tampilan PC.

4. Langkah selanjutnya masuk ke pilihan image dan di kolom penulisan penelusuran akan tampak icon kamera, silahkan sentuh icon tersebut

hasil penelusuran google image

5. Kemudian pilih file yang ingin anda unggah, bisa langsung melakukan jepretan kamera ponsel ataupun bisa mengunggah dari gambar yang sudah ada di galeri

6. Lalu tunggu sebentar selama proses upload gambar ke google search berjalan

7. Setelah sukses nantinya hasil pencarian akan terlihat dimana gambar yang anda upload dan juga Terkaan terbaik untuk image tersebut akan ditampilkan di mesin pencari

Di contoh gambar yang admin unggah diatas saya menggunakan gambar gunting yang langsung admin upload dari hasil jepretan kamera ponsel dan hasilnya tidak jauh beda di mesin pencari, semua menampilkan nama terkaan yaitu cutting Tool atau alat pemotong lengkap dengan contoh image gunting di mesin pencari tersebut.

Nah, mudah sekali bukan cara melakukan pencarian foto yang tidak ketahui namanya dari google image via ponsel android?, semoga tips diatas bermanfaat.
Cara Membuat Blog di Blogger Milik Google

Cara Membuat Blog di Blogger Milik Google

Cara membuat blog di blogger sangat mudah dan gratis, seperti slogan google satu akun untuk semua, anda hanya perlu akun gmail google. Blog sudah dapat dibuat. Blogspot atau blogger adalah layanan platform website yang di sediakan oleh google.

cara membuat blog

Kenapa pakai blog blogger

Berikut ini kenapa kita pakai platform blogger untuk blog kita :
  1. Blog produk google.
  2. Bersifat gratis.
  3. Mudah di gunakan dan mudah di pelajari.
  4. Di dukung oleh banyak tutorial dan forum.
  5. Server tidak pernah down dan unlimited bandwidth.
  6. Mendukung adsense.
  7. Ramah search engine atau mesin pencarian.
  8. Bebas modifikasi template.

Platform Blog

Pada dasarnya platform blog di bagai menjadi 3, yaitu :
  1. Blog gratis
  2. Self hosting blog.
  3. Citizen journalism blog.

Blog gratis

Blog gratis atau free blog adalah blog yang mengandalkan domain dan hosting milik penyedia layanan blog.

Self hosting blog

Domain dan hosting berbayar, akan tetapi kita bisa bebas berekspresi membuat blog sesuai dengan apa yang kita mau.

Citizen journalism blog

Topik atau tujuan blog adalah sebuah berita.

Konten Blog

Berdasarkan format konten, blog di bagi menjadi 6 :
  1. Vlog (video blog) adalah isi konten utama video.
  2. Phlog (photo blog) yaitu isi konten utama photo.
  3. Audioblog yaitu isi konten utama blog suara (voice), misal mp3 blog, podcast atau pun blog yang penyedia file musik yang bisa di download.
  4. Microblog yaitu konten utama blog yang isi tulisan atau teks maksimal karakter 200. Contoh microblog adalah Twitter, Facebook, Myspace atau Linkedln, dan lain-lain.
  5. Nice Blog adalah topik konten sifatnya khusus atau topik tertentu. Seperti blog pemograman, blog olahraga, blog kesehatan, blog politik, blog agama, blog fashion, dan lain-lain.
  6. General Blog adalah topik konten aneka ragam atau topik konten umum.

Cara membuat blog

Asal kata Blog dari web blog yaitu sebuah aplikasi website yang bentuknya artikel, tempat menyalurkan ide sesuai dengan tujuan dan topik si pembuat blog.
Berikut ini 6 cara membuat blog di blogger, berikut ini langkah yang anda lakukan :
  1. Anda harus punya akun gmail google.
  2. Masuk ke website blogger.com, lalu isi email dan password anda.
  3. Akan ada ucapan selamat datang di blogger, klik tombol lanjutkan ke blogger.
  4. Klik tombol blog baru.
  5. Akan tampil form yaitu judul blog, nama blog dan pilih template.
  6. Klik tombol create blog atau tombol blog.
  7. Selamat, anda punya sebuah blog.
Jika ada kritik dan saran cara membuat blog di blogger milik google isi komentar di bawah ini.


Sumber : http://www.carilahaku.com

Inilah Yang Wajib Ada Di Blog Kita Ketika Ingin Mendaftar Google Adsense?

Hallo sobat blogger. kali ini saya ingin berbagi ilmu, konten yang harus di lengkapi pada blog kamu
Google Adsense adalah salah satu model bisnis online yang paling umum dan paling terkenal dikalangan para blogger di dunia dan juga di Indonesia. Google Adsense sebuah program periklanan online yang dimiliki oleh Google. Google Adsense adalah cara tercepat dan cara termudah bagi pemilik website/blog untuk menghasilkan uang dari internet.
Inilah Yang Wajib Ada Di Blog Kita Ketika Ingin Mendaftar Google Adsense?


Caranya yaitu dengan memasang iklan Google Adsense pada web/blog, jika ada orang lain atau pengunjung situs/blog yang klik iklan maka Anda akan mendapatkan komisi dari Google.tentu para blogger yang ingin mendapatkan google adsense. inilah blog kamu yang wajib kamu lengkapi sebelum mendaftar google adense.

1. Views blog / day
Views blog / day, ini lah sangat mempengaruhi blogger kamu agar di terima google adsense mengapa? dikarenakan google adsense akan memerima blog yang sudah banyak views kamu maka konten blogger kamu agar kelihatan sudah banyak pengunjung dalam perharinya kemungkinan google adsense akan menerima blog kamu.

2. Komentar di blog
Sebenarnya komentar pada blogger menurut kita tak penting, yang ada di fikiran kita hanyalah post blogger kIta harus banyak. dan teryata tidak hanya post kita saja yang harus banyak, komentar pada pun blogger kita haruh memdai agar terlihat ramai dalam blog kita dan ingat jika komentar jangan sampai ada yang memasukan link blog orang lain yang aktif pada post kita atau di sebut juga spam. kenapa karena adsense tidak suka.

3. Label pada post
Ternyata label pada post kita pun sangat nagaruh kenapa ? kerana untuk merapikan post blog kita agar tidak acak acakan ,selain itu juga agar mudah di cari apa yang inin di baca oleh si pembaca.

4. Title text alt text
Ternyata sahabat blogger masih ada yang selalu menghiraukan alt text pada gambar di kosongkan begitu saja padahal itu salah Yap emang salah menurut saya pribadi untuk optimasi seo dasar apalagi menghadapkan suatu artikel ke search engine yang berisikan banyak gambar. Kenapa disini saya menyebutkan salah ! karena kalau suatu gambar yang di upload ke postingan dan tidak menggunakan alt teks sama saja kalian menuangkan air pada gelas yang bolong bawahnya. jadi percuma kalian mengoptimasikan seo on-page pada suatu artikel tapi tidak memasukan alt tek di gambar tersebut dan tentunya mesin pencari akan kebingungan untuk Menyeken gambar yang di upload kalian.

Sekian dari saya itulah .saran dari saya semoga bermanfaat dan terus perbaiki lagi bloger kita sekian dari saya


sumber : https://vikyardi-m.blogspot.co.id/

How to Delete a Blogger Blog Permanently

So you really messed something up and need to delete a Blogger blog permanently, but don't know how? You might have encountered an error message you can't get rid of, or it might be something wrong with the appearance.

delete a blogger blog permanently

Blogger lets us to create up to 100 blogs without worrying about bandwidth, but sometimes we just want to reduce the number of junk blogs from list to keep it short and simple. In this case, we may have decided that it is time to delete it. So how do you delete a blog on Blogger permanently?
Important: Removing or deleting your Blogger blog will also delete all of your blog data, including your existing blog posts. This means that your blog visitors won't be able to view your blog anymore, and that posts and pages associated with Blogger will be removed from your blog.

How to Delete a Blogger Blog Permanently

  • Log in to your Blogger.com dashboard.
  • Choose blog which you want to Delete.
Select Blog
  • Navigate to the Settings tab and just below it the Other option. Click on it.
delete blog
  • On the right side is the Delete Blog section. To proceed with the deletion then click on the Delete blog link.
If you think you may want to come back to your blog or you've got posts that you want to keep, you can use the Export blog tool to export your blog before you delete it. You can either download your blog posts to your desktop or export it in a format that can be imported into other popular blogging formats.
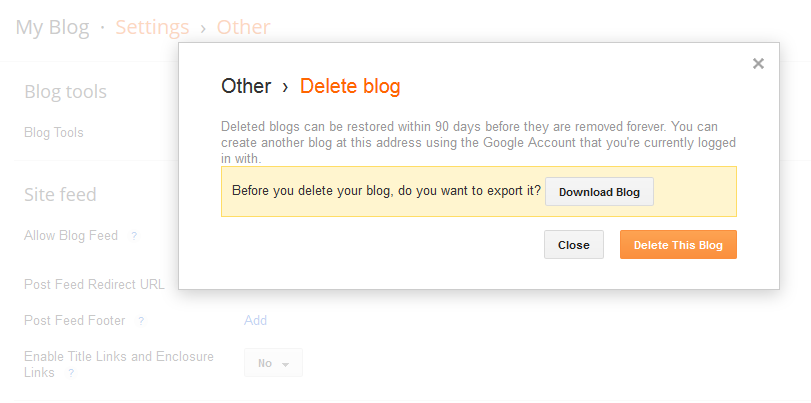
  • Confirm that you want to delete it and you're done.
how to delete blogger blog

Once you've pressed the Delete This Blog button, you will be redirected to the Dashboard. Notice that your blog is no longer displayed in the list of blogs. If you want to view your deleted blog you can click on the Deleted blogs link on the left side of your Blogger Dashboard to see your recently deleted blogs.

delete blogs

Here you'll be able to see your deleted blog including details of its deletion date. To restore your blog, click on the Undelete button. Please keep in mind that deleted blogs can be restored within 90 days.

  • If you want to delete your blog Permanently click on Permanently Delete.
    Deleting Blog is permanent and you won't be able to undo it.
  • Again Click on Permanently Delete.

That's all.

So this was our guide on How to Delete a Blogger Blog Permanently, I hope the methods given above helped you.

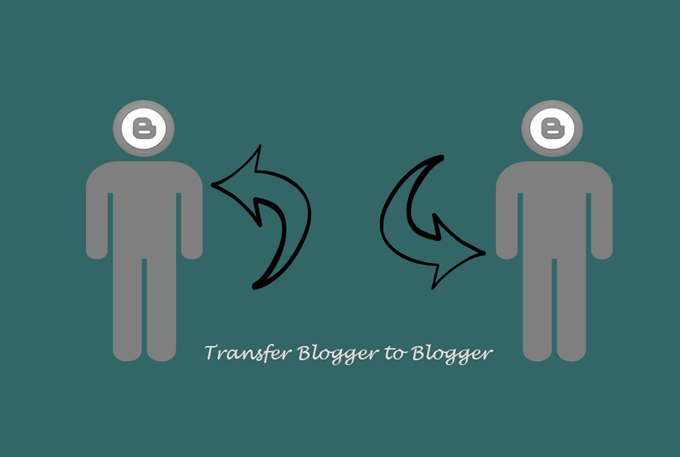
How To Transfer Your Blogger Blog To Another Blogger or Google Account

Do you want to Transfer Your Blogger Blog To Another Blogger or Google Account ? if yes then you are at right place. Today we are here with a guide on How To Transfer Your Blogger Blog To Another Blogger or Google Account.

Transfer Your Blogger Blog To Another Blogger or Google Account

For this example I have used two gmail account first one my personal gmail(******1@gmail.com) account and another one is my blog gmail account (*******2@gmail.com). Blog which was transferred Solvelogger Test.

The basic process is supposed to go something like this:
  • Log in to your Blogger.com dashboard.
  • Choose blog which you want to transfer.
Select Blog
  • Choose Setting.
Blog Setting
  • Under Setting > Basic, Choose "Permissions" to "+ Add authors".
Blog authors
  • Add "Email Account" in the box to which "Blogger" Account you want to transfer.
invite authors
  • If Above Steps were completed you get a "Invite Email" on "Gmail" Click Accept Invitation to Complete the process.
Invite Email

accept invitation

  • Go to First Blogger Account to Make "Author" to "Admin" to Another Blogger Account
Authors to Admin
  • Remove First User(Your Account) From that Blog
Remove First User
It automatically refresh the page and your blogger blog successfully transferred to another account.

So this was our guide on How To Transfer Your Blogger Blog To Another Blogger or Google Account, I hope the methods given above helped you.

How to Fix Error 498 in Google Play Store

Recently While Downloading Asphalt game on my Smartphone I got an Error 498 in Google Play Store. To be Exact, the Error Reads Error 498 has occurred while communicating with the server.

Fix Error 498 in Google Play Store

I Tried again but the Same Error Again. After Few Tweaks i was finally able to download and Install Asphalt on my Phone.

Because i Faced this error in Google Play store, i though there will be many other people facing the same error and so this Guide on how to Fix Error 498 in Gooogle Play store.

Here on this Page i will be sharing few Methods that will help you to get rid of it. Though any one listed Method will not work for Everyone to Get rid of Google Play Error 498 because there are different reasons that are responsible to cause this error.

Causes of Error 498 in Play store


There are Few things that causes this Error on your Smartphone while you try to download any app from Google Play store.

The Most common issue is the Size of Device's Cache Partition. You will get Error 498 in play store if you try to download apps that are larger in size then your Device's Cache partition.
For Eg: Your Cache partition is of 30M and you try to download an app with Size 35M then you might get this error. Usually Play store have issues when downloading apps that are large in size.

Another Reason is Google Servers from where you are trying to download the apps might be under maintenance. So if you are downloading an App and you get Play store erro 498 message then Server may be the issue. Just wait and try to download it again.

So these were just Couple of Possible Reasons for a User to get this Error in Google Play store, Now let us see Some Possible Ways to Fix it.

5 Ways to Fix Google Play store Error 498

Method 1: Clearing Cache

Most Common Reason you might be facing this Error is because of Cache, so i will start the Methods list by Recommending you to Clearing the Cache.

To do So, Just navigate to Settings > Applications > Manage Applications > Select Google Play store > Clear Data & Clear Cache.

Now Try and download the App if Cache was the problem and clearing it solved the Issue for you. One more reason of listing this method on top is this worked for me and i was able to download the game easily after clearing the Cache. Though the Solution for all might not be the same so try below methods too.

Method 2: Use Wifi to Download

Many a times your Internet Service Provider(ISP) Creates this Problem of Error 498 and many other Errors. so Try and get access to Wifi somehow and try to download the app thats giving you the Error.

Method 3: Adding New Play Store account

You will need to Add a new Play store account inorder to fix this Error. Go to Settings > Accounts > Add New Account > Click on Google > Next > Enter email > Done.

After setting up new Play store account try to download the same app and see if this have Solved your Problem.

Method 4: Connecting with Computer

One of my Friend reported that he fixed Error 498 by installing apps from Computer to Smartphone. You just need to connect your Smartphone to Computer Using USB Cable. then goto Google Play Store using your Favourite Browser on your Computer. Then Search for the App which was getting error on your Smartphone.

Click on the Preferred Result that you get, next On the App page you will see Install button. Click it to Download that app On your Smartphone. No it will not Install on your Computer. it will Install on your Smartphone. Just make sure your Smartphone is Connected or else you will not See Install Button.

Method 5: Uninstall & reinstall Google Play store

If your Phone is Rooted then You might just want to Uninstall and Then Reinstall Google Play store so that to make sure that you actually get rid of Error 498 in Google Play Store. If any of the above Listed methods don't work for you then go for this one and you will fix it for sure.

So these were 5 Methods to Fix Error 498 In Play Store. I hope this helps you to get rid of this error and you can again download your favourite app from play store just like before.

If these Helps then please don't forget to spend few seconds and Comment below which Method solved the Issue for you. Or If you have any other way to get rid of this error message in play store then feel free to share it in Comments below.